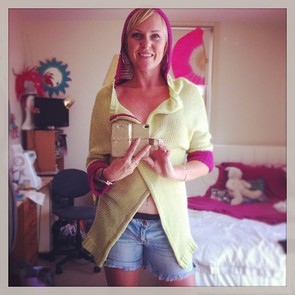
 Done in one hour! The finished product! At last Tuesday's Revamped Fashion class I was telling my students about a big, cosy, yellow jumper I'd seen at the Supre' warehouse in Marrickville. When I saw the jumper I thought about how nice it would be if it was a cardigan and had a hood. My students were quite excited as I was telling them about my idea, so the very next day I visited the warehouse. 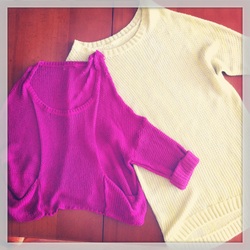 As my luck would have it (and I appear to be a very lucky lady these days) there was a 50% off sale! I have mixed emotions going to these factory warehouses. It's like clothing carnage! Seeing the masses of replicated items stirs me up a bit (heavy breathing, hot flushes), but if I can get over the fear, and the thought of the planet pollution, and just accept that this clothing is here and has already been produced, then I can look at the situation like finding buried treasure! There are so many cheap items to cut up and put to use in completely different ways! 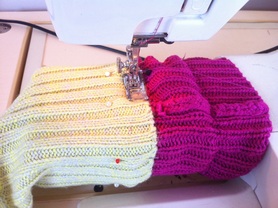 Attaching the magenta cuff. As I was looking around the warehouse there were so many jumpers to choose. There was a great variety of colours, textures and details. I knew I wanted to cut the yellow jumper up the centre front and make a baggy cardigan I could wrap around me, but what else was possible? I loved the combination of the magenta with the yellow. The magenta jumper had baggy cuffs on it, so I thought they would be a great feature to cut off and add onto the cuffs of the yellow jumper. It was quite easy to do. I cut the magenta cuffs off, making sure I has about 2cm seam allowance above where the ribbing started. Once I cut the cuffs off, I zig zagged around each one to prevent fraying or unravelling. I then pinned the magenta cuff to the yellow one and stitched around them. After this I folded the magenta cuff up and hand stitched it it in four places. 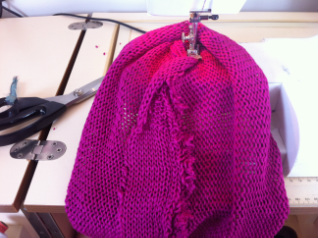 Covering the centre back seam of the hood. I also used the bottom of the magenta jumper as the edge of the hood. If you're looking at chopping up loose knit items such as jumpers, think about the edges of the garment and how you can use them. You need to work quickly with loose knits as they can fray. You can prevent fraying by either overlocking around the edge, or using a zig zag stitch. I'm experienced enough to cut out hoods freehand. I don't use a pattern. If you don't have that confidence, use a hood from another jumper as a guide. I found that the centre back seam on the inside of the hood looked pretty ratty, so I cut another strip of magenta knit to cover over it. *Loose knits are pretty forgiving when it comes to stitching on top of the fabric. I found that I could stitch this strip on with the stitching lines being easily hidden. **I also found that using a mid-width zig zag stitch was valuable as the fabric has stretch in it. If you're sewing stretchy fabric you need you use some zig zag so the threads don't break as the fabric expands. Once all of this was done I evenly pinned it to the neckline and stitched the hood in place. I placed the hood on the inside of the cardigan first, then stitched it, then folded the hood up and stitched it again to hide the raw edges. This is a bit hard to explain and for some of you this may be a challenge, for others, this may be simple. Have a play and see how you can join the hood to the neck line whilst hiding the hood's raw edges.  The centre front detail. FInally, the last detail I created was on the centre front of the now, cardigan. The magenta jumper had a great ribbed neckline. I chopped it off (leaving some seam allowance) and used it to neatly finish the centre front of the cardigan. It's an extra pop of colour and really looks great! There was only enough ribbing for one side, so on the other side of the cardigan I just double folded it and stitched it so it has a neat finish. There you have it. You can be in da hood in an hour! One hour was all this took me and I only spent $15. Next time you see some knit jumpers, check out the details and have a think of how you can revamp them. As always, I'd love to see your Revamped creations! Feel free to share them on the Facebook page. Also, I'd love your feedback. It's important to me that I'm delivering content you find useful and interesting. What would you like to see more of? Do you want more step-by-step instructions? Anything else you think is helpful? All feedback is appreciated. Warmest wishes, Angie xo
0 Comments
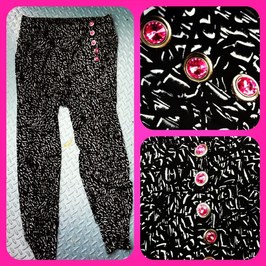 This week I have a quick and easy D.I.Y for you. Buttons are the ultimate tool to transform a garment from drab to fab! I thought I'd hit the jackpot when I came across these pants in K Mart. $19 for some groovy, low crotch pants! I loved them but as you can see from the original photo, they were a bit too plain for me. 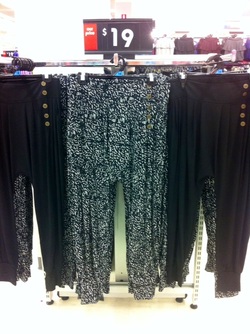 I found these gorgeous pink buttons at Tessuti Fabrics in Surry Hills and it only cost me less than $10 for five of them. The pants look so much more 'designer' now. I'm so happy with the result and so many people stop me to ask me about my pants and the cool buttons! When you go shopping, think about which other items you can change the buttons on. Shirts, dresses, coats and blazers can all be glammed up and given your original touch simply by changing the buttons! Give it a go and as always, please post your Revamped projects on our Facebook page. Sharing is caring and you might just inspire someone else to give it a try. Happy Revamping! I love, Love, LOVE tails! The glitz. The glamor. The razzmatazz! A garment with tails makes me want to grab a top hat and tap dance. Whoo! 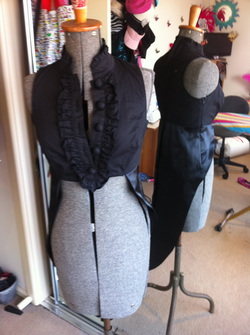 I was thrilled when I came across the challenge of transforming a pretty average looking top into a sexy new tails creation! The original top had a great collar and shoulder line, so I wanted to keep those things as a feature. The bottom half of the top just hung... So what I've done here is I've cropped off the front of the top (I finished the inside nicely with some bias tape), and then I've used the bottom of the bust lines as my guide for the line of the tails. I found a satin skirt to cut up and use for the lower half of the garment, and the fabric which was formerly the bottom half of the top was used as lining. Have a go and see what you come up with. It's possible to create 'tails' coats, vests and tops out of long jackets, suit jackets, dresses and probably more! As always, feel free to share your creations and post them on our Facebook page: http://www.facebook.com/revampedfashion
|
AuthorI am a freelance designer and stylist who creates avant-garde fashion and costume. I specialize in custom making costumes for musicians, physical theatre, and dance companies. I love what I do and I love to share my passion and teach others :D Archives
April 2017
Categories
All
|

 RSS Feed
