
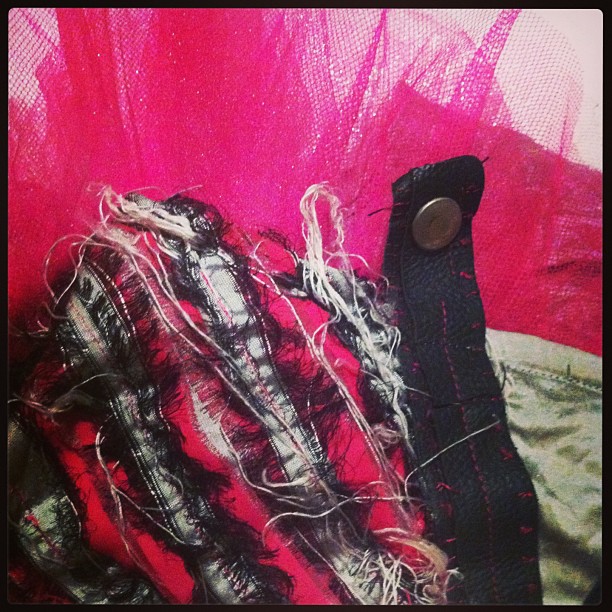
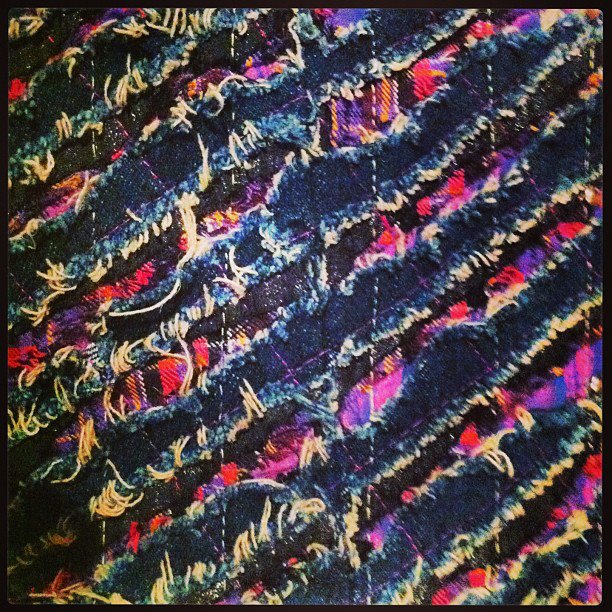
I love to play around with this technique, experimenting with layers of various fabrics, colours and textures. A simple way to make Chenille is by layering fabric (practice with three), stitching diagonal lines across the grain, and then cut in-between the lines. 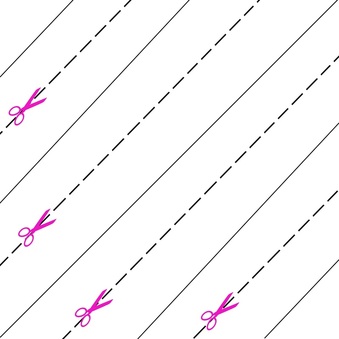
Have you experimented with creating your own chenille fabrics? I'd love to see your designs. As always, you can upload them onto our Facebook page and inspire the Revamped Fashion community!
2 Comments
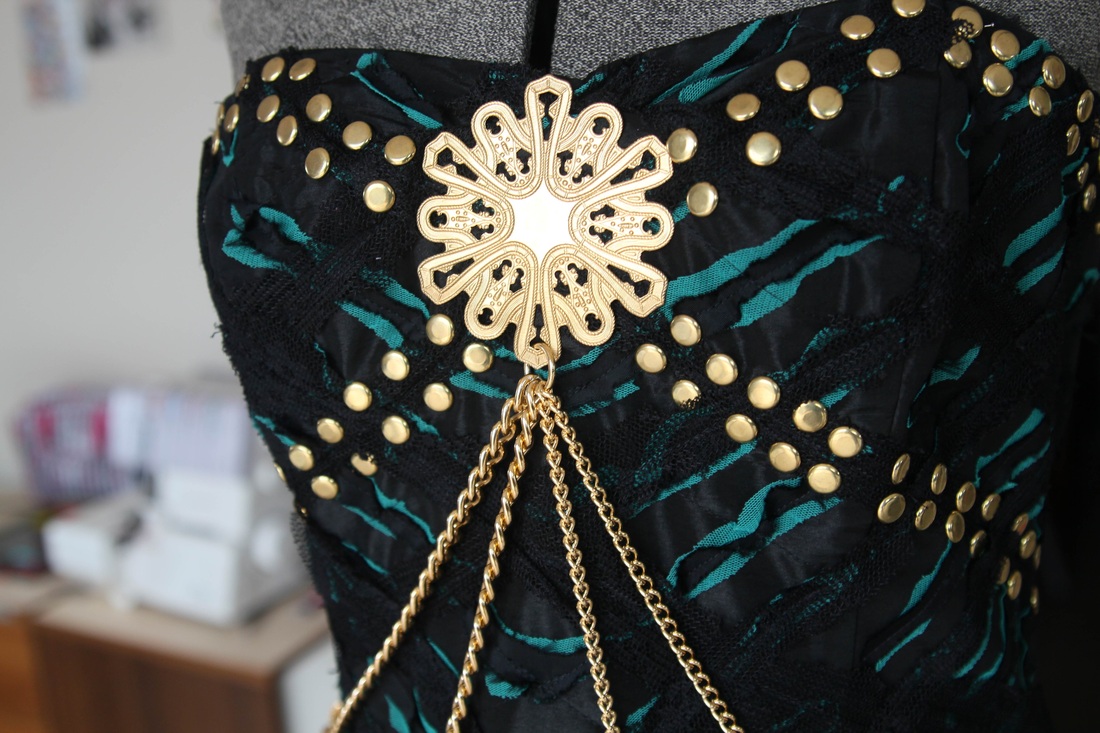
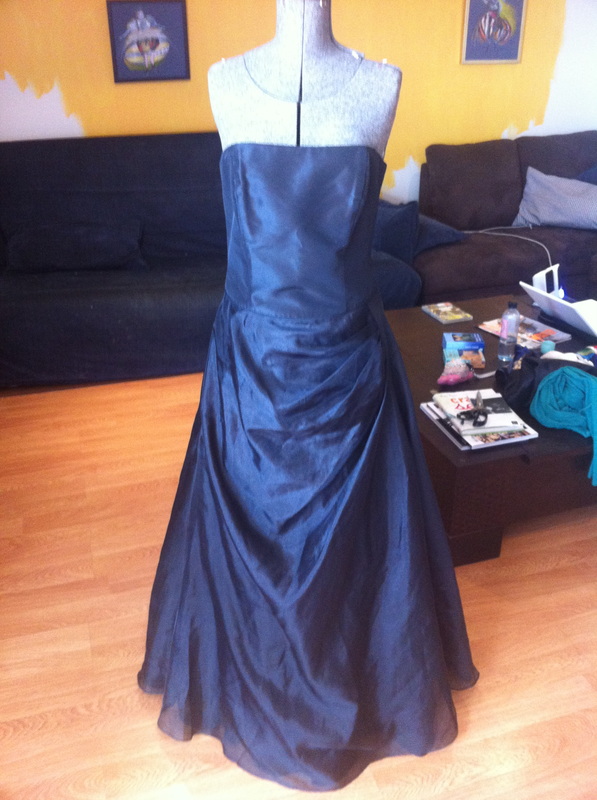
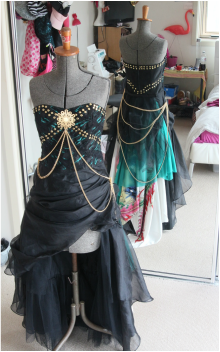
This week's Revamped transformation is one of my favorites! My client is an exciting, young, musical talent who is on the verge of exploding to international stardom and success! The brief was: - Design an edgy, glamorous gown for a photo shoot. - The theme is glamor, with an urban, street feel. - Inspiration from early 90's Versace Supermodels. - Create a train which has layers to be detached. 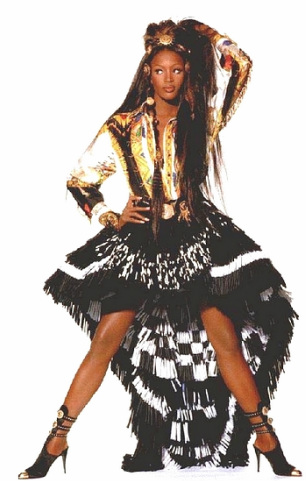 Naomi Campbell in this Gianni Versace masterpiece! Breathing new life into a simple formal dress is a passion of mine. It fires me up inside! It's like the dress was intended for a great party, and I have the ability to set that dress free so it can experience the BEST party ever!!!
A formal dress can be a excellent canvas, as often these gowns have a great fitting bodice, and lots of fabric and layering in the skirt. This particular dress had fantastic layers of taffeta and organza in the skirt, fantastic fabrics to drape and create drama and volume! There are three elements to this gown: - The Bodice - The Skirt - The Train Next week I'm going to break down a fabric layering technique called chenille. Follow us on Instagram (@ revampedfashionlovesu) or Facebook to see some of next week's pics. 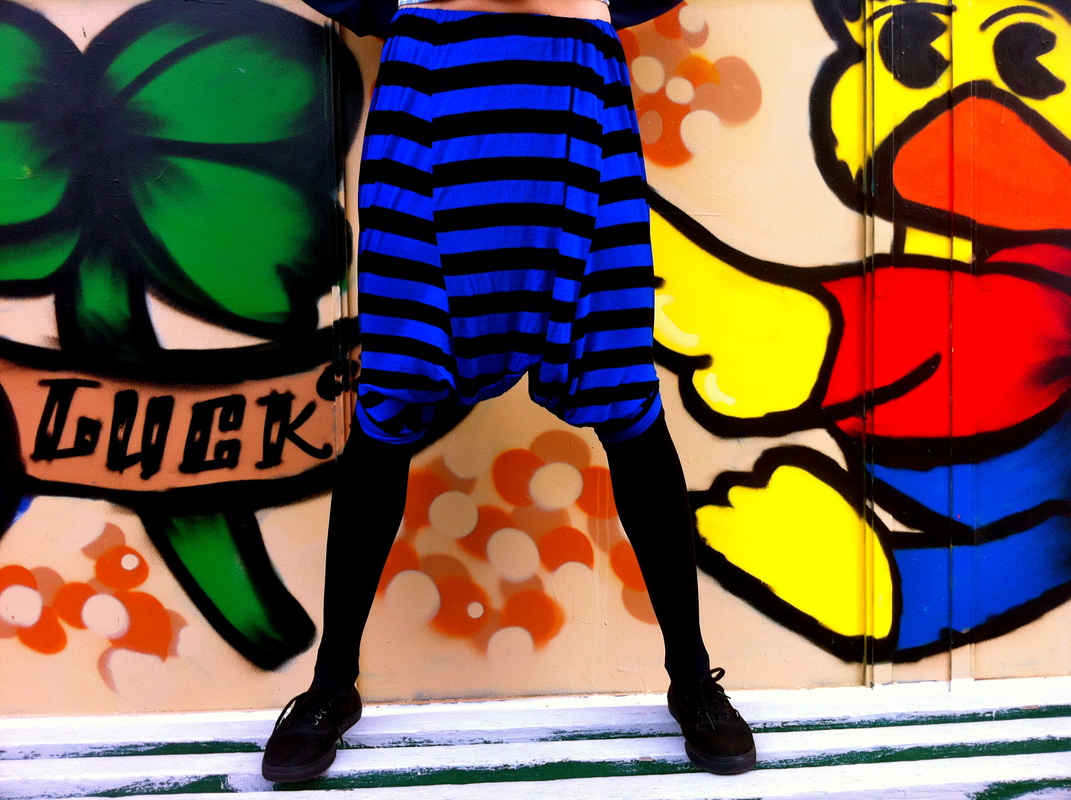
Check it out! Do you get it? Can you see what I've done here? I've been teaching in Tasmania this week and have been blown away by that talent and enthusiasm from both students and teachers. Many new resources have been shared with me and I've been filled with inspiration! I'm looking at clothing with fresh eyes and a widened perspective. It's been wonderful to have time to be creative and learn from others. While I was in class, teaching today I was looking at a t-shirt and had a fabulous bolt of inspiration! "What would happen if I stitched the neck up, put your feet through the sleeves, and put elastic around the hem to wear as a waist band?" The kids were excited... I was excited... less than an hour later the t-shirt had become a funky pair of dropped crotch shorts. T-shorts! 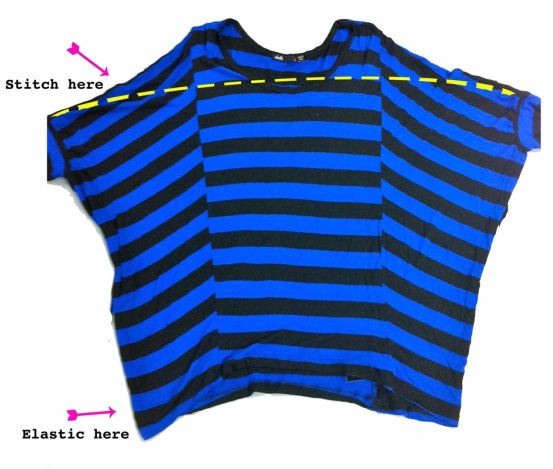 This Revamp was very simple:
1. Turn the t-shirt inside out and lay flat. 2. Pin from the top side of one sleeve, across the neck and shoulders to the top side of the other sleeve, then stitch. 3. Create a loop of elastic (approximately 2.5cm wide) to fit around your waist. 4. Fold over the hem of the t-shirt (to create a casing for the elastic) and use a zipper foot to stitch in place. * You can trim away any excess fabric around the former neck and shoulders to remove bulk from the crotch. I think these shorts are really street and cool and now I'm on the look out for t-shirts which have interesting detail on them to create cool t-shorts! If you make a pair of t-shorts I'd love to see them! Post them on our Facebook page and keep the Revamped Fashion community inspired :D 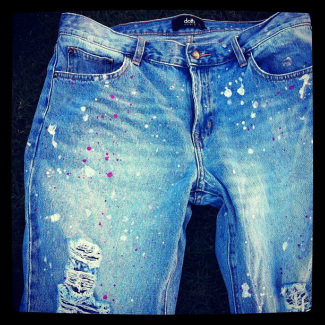 This week's project is another one of those ideas that came to me in a dream. Some of my favorite design inspirations have come to me in that yummy half an hour before I properly wake up. I'd been thinking about getting a new pair of jeans for winter and had been researching boyfriend jeans. I've always really liked light coloured, distressed denim, and the bagginess and comfort of the boyfriend jean is very appealing. They're a cool 'street' sort of jean which can be dressed up or down so I decided it was a sound investment. 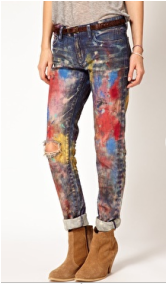 During my research, a colourful pair of Ralph Lauren boyfriend jeans caught my eye. They were smeared with coloured paint and reminded me of the 'splishy splashy' trend (as a four year old, I was absolutely obsessed with), of the early 80's! I went to bed that night happy with my findings, so happy that the next morning I had a dream that I was flicking silver and hot pink paint on a pair of jeans in someone's back yard! Today, I made that dream come true! 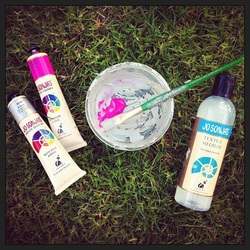 You will need:
First step is to mix up the paint with the textile medium as per the instructions on the textile medium bottle. *Textile medium is a product you mix with paint to turn it into a washable paint. 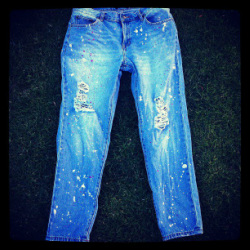 The second step is to find a place where you can flick the paint. A patch of grass is good. If you don't have this luxury put down some newspaper or a tarpaulin and lay the jeans flat on the ground. The third step is the fun part. Load up your brush with paint and start flicking! I found that the 'more is more' approach works for me. I'd done two layers of flicking (one pink and one silver), and after I had another look at the Ralph Lauren jeans I decided that I was ready to make a statement with my paint! I decided an extra two layers of flicked silver paint was necessary. If I really wanted to go nuts I could probably do more, and maybe I will add more next week! Step four takes place once the paint is dry. Set up your iron and get ready to heat set the paint. The instructions on the Textile Medium say to iron the paint for two minutes. That doesn't mean to iron the whole garment in two minutes! Take your time with it. Place an ironing cloth or a piece of brown paper in between the paint and the iron (you don't want the paint to melt on to your iron), put on your favorite music or tv show, and relax as you slowly move the iron over each section of the paint. 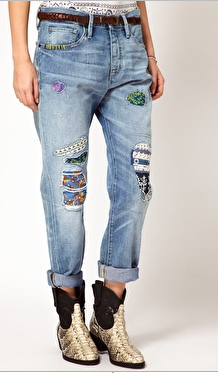 To the left is another example of how Ralph Lauren Revamp their clothing. Think of different ways you can Revamp a pair of jeans?
I'd love to see your creations! As always, you're welcome to share your ideas and post them on the Facebook page. Happy paint flicking! |
AuthorI am a freelance designer and stylist who creates avant-garde fashion and costume. I specialize in custom making costumes for musicians, physical theatre, and dance companies. I love what I do and I love to share my passion and teach others :D Archives
April 2017
Categories
All
|
 RSS Feed
