
Hello...Happy holidays! I hope your home is full of excitement and sparkles. Gosh, it's been so long since I've written to some of you, and welcome to all of my new subscribers. So much has been happening and I'm excited to share these updates with you. Revamped DIY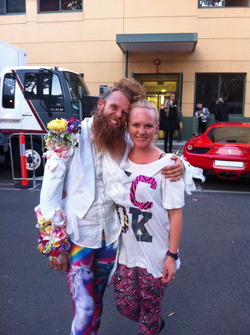 I'm finally back behind my computer after three months of madness on 'Australia's Got Talent'! I have so many Revamped DIY projects to share with you, so over the next few weeks I'm going to be documenting them and I'll be posting on the blog more regularly. Thank you so much for your love and support while I've been working so hard. It really lifted my spirits hearing from people who were enjoying the show and wanting to come to classes. This week's Revamped DIY features the 'Flower Power' tails jacket I created for the fabulous Tommy Franklin. Here's the link: http://www.revampedfashion.com/1/post/2013/12/flower-power.html Jessica MauboyLast month I had the absolute pleasure to work with Jess Mauboy and her band. What an incredible group of people to work with. Jess is an absolute delight! She's so real and cool and sweet and just a wonderful (and super talented) human. What a lady! I was working with the band and backing vocalists, styling them to look sharp next to Jess in her incredible, custom made outfits. You can catch the regional tour in January. It's a fantastic show so get out there and support Australian music and our very own, home grown pop star! Here's the link to tickets: http://www.jessicamauboy.com.au/events Sew Make Create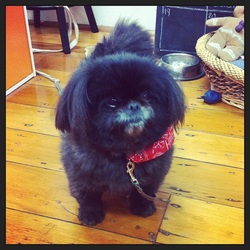 Sew Make Create is a gorgeous sewing school and shop in Chippendale. Melissa and Pepper (it's owners) have created a great community atmosphere. Becasue it's in my neighbourhood I love stopping by to say hi, and to get cuddles from Pepper (left). Due to popular demand I'll be running two 'Kids and Teens Introduction toe Sewing' courses and 'Kids and Teens Sew a Skirt' for the more experienced sewers. Here's a link to the website to find out details: http://www.sewmakecreate.com.au/classes/category/kids-teens/ Well that's a wrap up from me for now. Keep updated on our social media sites and please share your creations. I love hearing from you! Thank you for all of your love, support and energy this year! 2013 has been a truly magical year for me. I'm very excited to see what 2014 will bring. Warmest wishes and Peace and LOVE! Angie xo Facebook: http://www.facebook.com/revampedfashion http://www.facebook.com/angelawhitecostume Instagram: revampedfashionloves
0 Comments
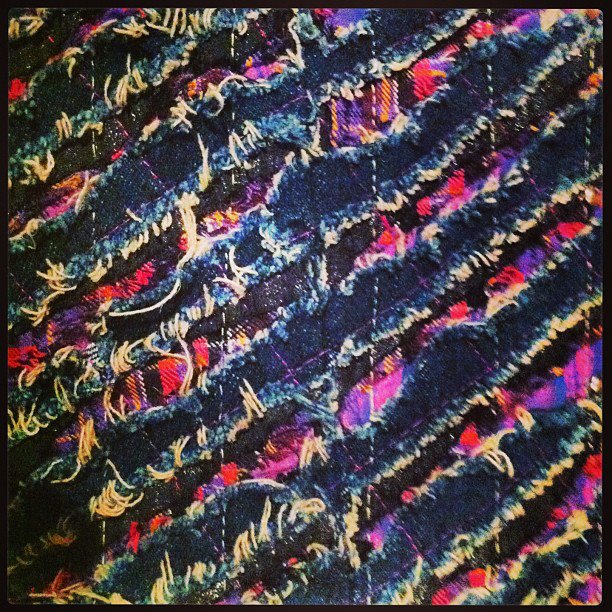
I love to play around with this technique, experimenting with layers of various fabrics, colours and textures. A simple way to make Chenille is by layering fabric (practice with three), stitching diagonal lines across the grain, and then cut in-between the lines. 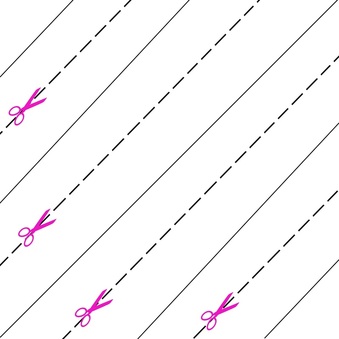
Have you experimented with creating your own chenille fabrics? I'd love to see your designs. As always, you can upload them onto our Facebook page and inspire the Revamped Fashion community!
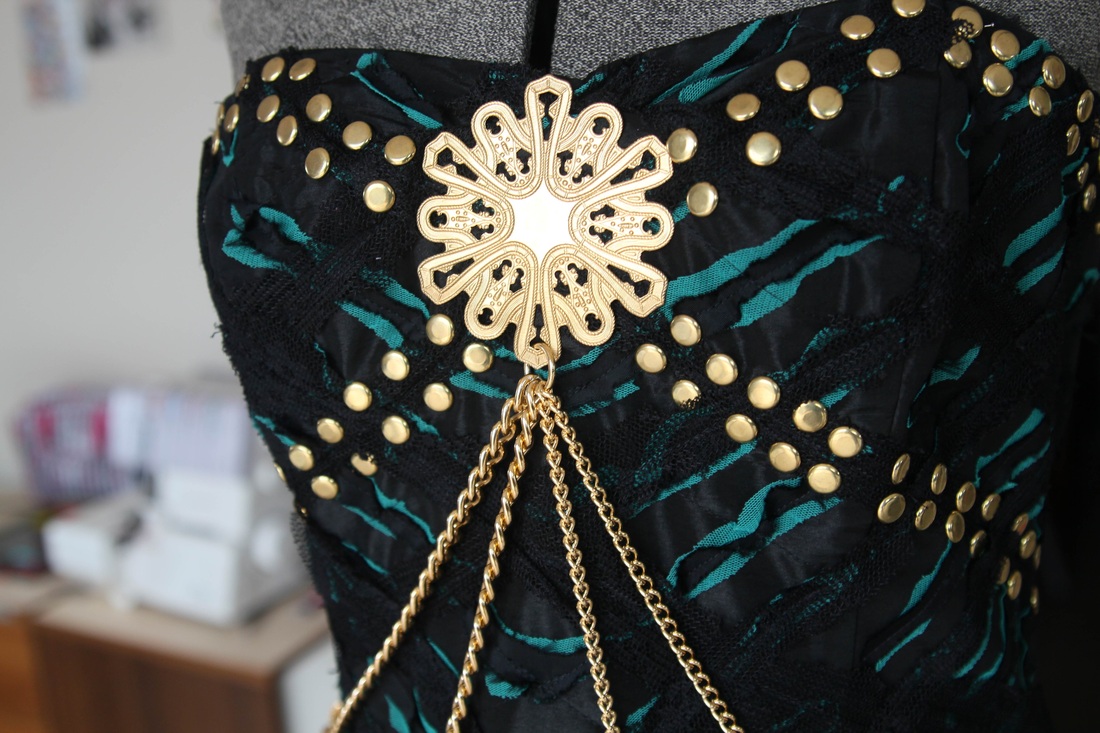
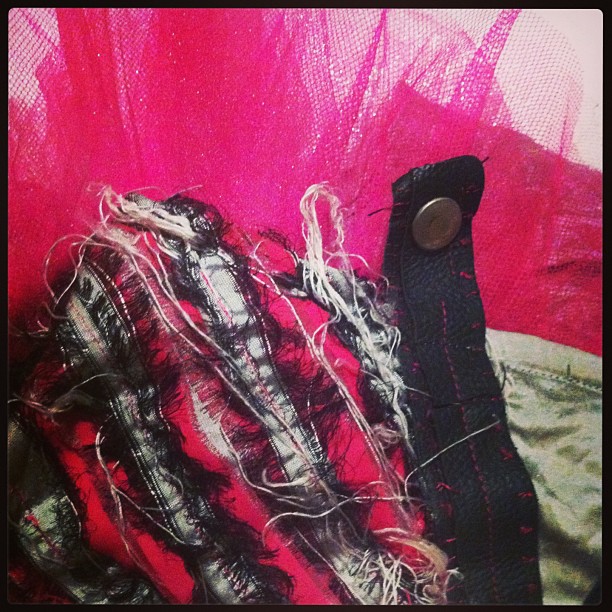
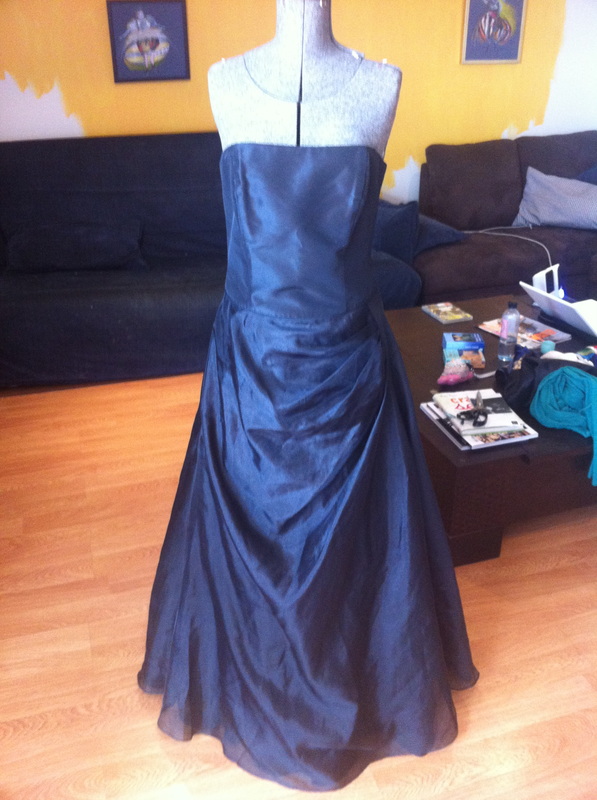
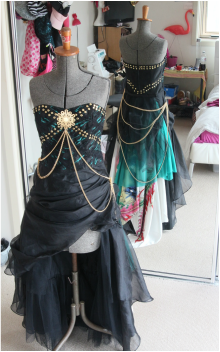
This week's Revamped transformation is one of my favorites! My client is an exciting, young, musical talent who is on the verge of exploding to international stardom and success! The brief was: - Design an edgy, glamorous gown for a photo shoot. - The theme is glamor, with an urban, street feel. - Inspiration from early 90's Versace Supermodels. - Create a train which has layers to be detached. 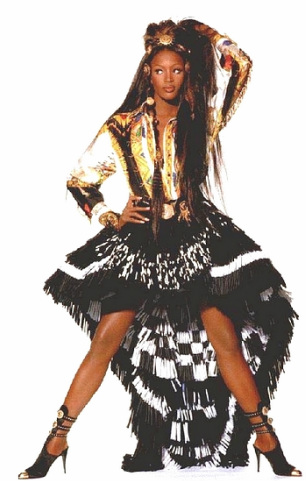 Naomi Campbell in this Gianni Versace masterpiece! Breathing new life into a simple formal dress is a passion of mine. It fires me up inside! It's like the dress was intended for a great party, and I have the ability to set that dress free so it can experience the BEST party ever!!!
A formal dress can be a excellent canvas, as often these gowns have a great fitting bodice, and lots of fabric and layering in the skirt. This particular dress had fantastic layers of taffeta and organza in the skirt, fantastic fabrics to drape and create drama and volume! There are three elements to this gown: - The Bodice - The Skirt - The Train Next week I'm going to break down a fabric layering technique called chenille. Follow us on Instagram (@ revampedfashionlovesu) or Facebook to see some of next week's pics. 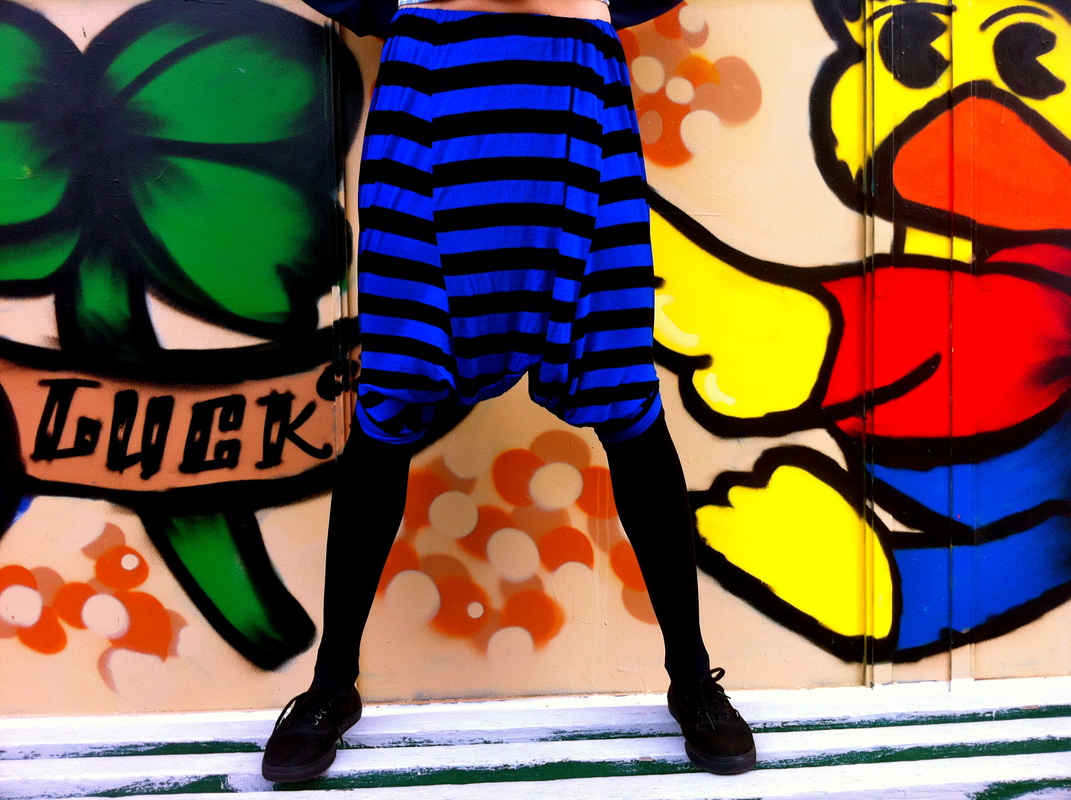
Check it out! Do you get it? Can you see what I've done here? I've been teaching in Tasmania this week and have been blown away by that talent and enthusiasm from both students and teachers. Many new resources have been shared with me and I've been filled with inspiration! I'm looking at clothing with fresh eyes and a widened perspective. It's been wonderful to have time to be creative and learn from others. While I was in class, teaching today I was looking at a t-shirt and had a fabulous bolt of inspiration! "What would happen if I stitched the neck up, put your feet through the sleeves, and put elastic around the hem to wear as a waist band?" The kids were excited... I was excited... less than an hour later the t-shirt had become a funky pair of dropped crotch shorts. T-shorts! 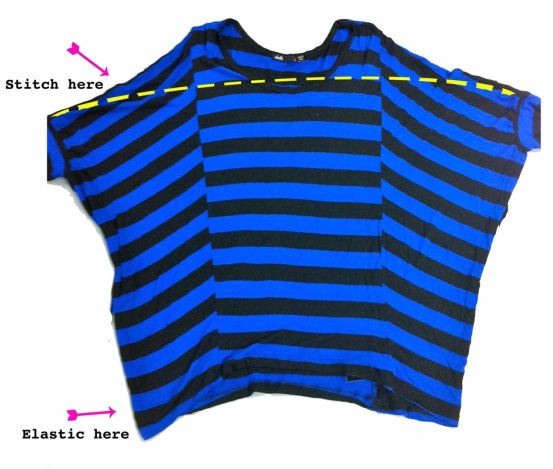 This Revamp was very simple:
1. Turn the t-shirt inside out and lay flat. 2. Pin from the top side of one sleeve, across the neck and shoulders to the top side of the other sleeve, then stitch. 3. Create a loop of elastic (approximately 2.5cm wide) to fit around your waist. 4. Fold over the hem of the t-shirt (to create a casing for the elastic) and use a zipper foot to stitch in place. * You can trim away any excess fabric around the former neck and shoulders to remove bulk from the crotch. I think these shorts are really street and cool and now I'm on the look out for t-shirts which have interesting detail on them to create cool t-shorts! If you make a pair of t-shorts I'd love to see them! Post them on our Facebook page and keep the Revamped Fashion community inspired :D 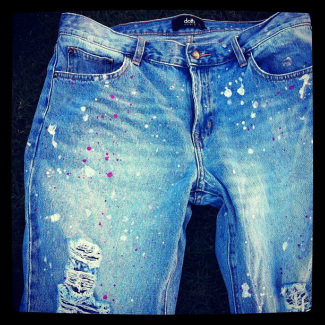 This week's project is another one of those ideas that came to me in a dream. Some of my favorite design inspirations have come to me in that yummy half an hour before I properly wake up. I'd been thinking about getting a new pair of jeans for winter and had been researching boyfriend jeans. I've always really liked light coloured, distressed denim, and the bagginess and comfort of the boyfriend jean is very appealing. They're a cool 'street' sort of jean which can be dressed up or down so I decided it was a sound investment. 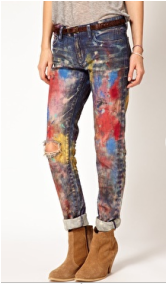 During my research, a colourful pair of Ralph Lauren boyfriend jeans caught my eye. They were smeared with coloured paint and reminded me of the 'splishy splashy' trend (as a four year old, I was absolutely obsessed with), of the early 80's! I went to bed that night happy with my findings, so happy that the next morning I had a dream that I was flicking silver and hot pink paint on a pair of jeans in someone's back yard! Today, I made that dream come true! 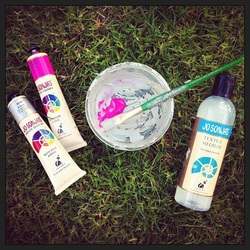 You will need:
First step is to mix up the paint with the textile medium as per the instructions on the textile medium bottle. *Textile medium is a product you mix with paint to turn it into a washable paint. 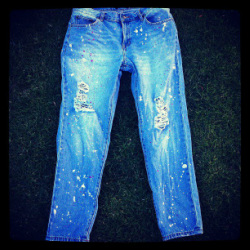 The second step is to find a place where you can flick the paint. A patch of grass is good. If you don't have this luxury put down some newspaper or a tarpaulin and lay the jeans flat on the ground. The third step is the fun part. Load up your brush with paint and start flicking! I found that the 'more is more' approach works for me. I'd done two layers of flicking (one pink and one silver), and after I had another look at the Ralph Lauren jeans I decided that I was ready to make a statement with my paint! I decided an extra two layers of flicked silver paint was necessary. If I really wanted to go nuts I could probably do more, and maybe I will add more next week! Step four takes place once the paint is dry. Set up your iron and get ready to heat set the paint. The instructions on the Textile Medium say to iron the paint for two minutes. That doesn't mean to iron the whole garment in two minutes! Take your time with it. Place an ironing cloth or a piece of brown paper in between the paint and the iron (you don't want the paint to melt on to your iron), put on your favorite music or tv show, and relax as you slowly move the iron over each section of the paint. 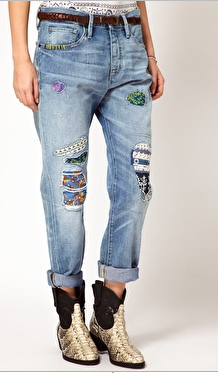 To the left is another example of how Ralph Lauren Revamp their clothing. Think of different ways you can Revamp a pair of jeans?
I'd love to see your creations! As always, you're welcome to share your ideas and post them on the Facebook page. Happy paint flicking! 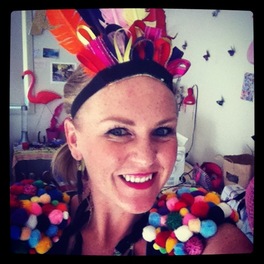 Today's Revamped D.I.Y Project is for those who adore being colourful, fun and free! My TWEEN group at the Ultimo After School Care program LOVED today's project and so did I. There are two parts to this project: the headpiece and the bolero. I'll start with the headpiece (which only took me about 40 minutes to create).  What you will need: - straw hat - craft scissors - hot glue gun and hot glue - feathers, zips, ribbons - 2.5cm wide elastic I started the project with a hat, some feathers, ribbons and zips, and a few ideas.... "What is this hat's new destiny? What will it become?" I was thinking of a neck piece, a visor, a necklace pennant... eventually once I started building, the headpiece evolved! 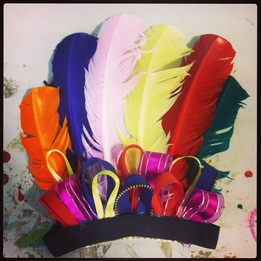 Firstly I cut a 15cm section from the brim of the hat, which I used as the base for the headpiece. I chose to mount the feathers on top of this, if you placed the feathers behind the base the straw would be exposed and you could also use it as a feature. In class today students were gluing chains, pom-poms, foam hearts, letters, and gems onto the straw. I think it could also look great if the edges were frayed or even painted. I chose to decorate the front of the feathers using strips of ribbon and zips. I used a variety of colours, widths and textures which I think made it look interesting. To make the headband I joined a piece of elastic to form a band around my head, then I hot glued it onto the front of my colourful, feathered creation! 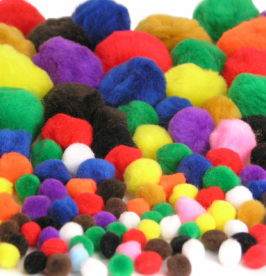 The fabulous pom-pom bolero was inspired by Nicki Ninaj's famous outfit. I love the big shoulders as it feels fun and glamorous to wear, and really helps to create an hourglass shape. What you will need: - Craft pom-poms in a variety of colours and sizes.- Hot glue gun and hot glue - A bolero or cardigan (you can cut the sleeves short). This garment was very simple to make. Sewing skills are not necessary. Tough hands (as you probably will get burnt by the hot glue) and an artistic flair are essential!  Firstly, put your favorite booty shakin music on really loud. Next, either place the bolero on a hanger or on a dress maker's mannequin, then, start randomly gluing the pom-poms onto the sleeve and shoulder until the shoulders are puffy and full. It's quite nice to dance as your doing the gluing. That's it!
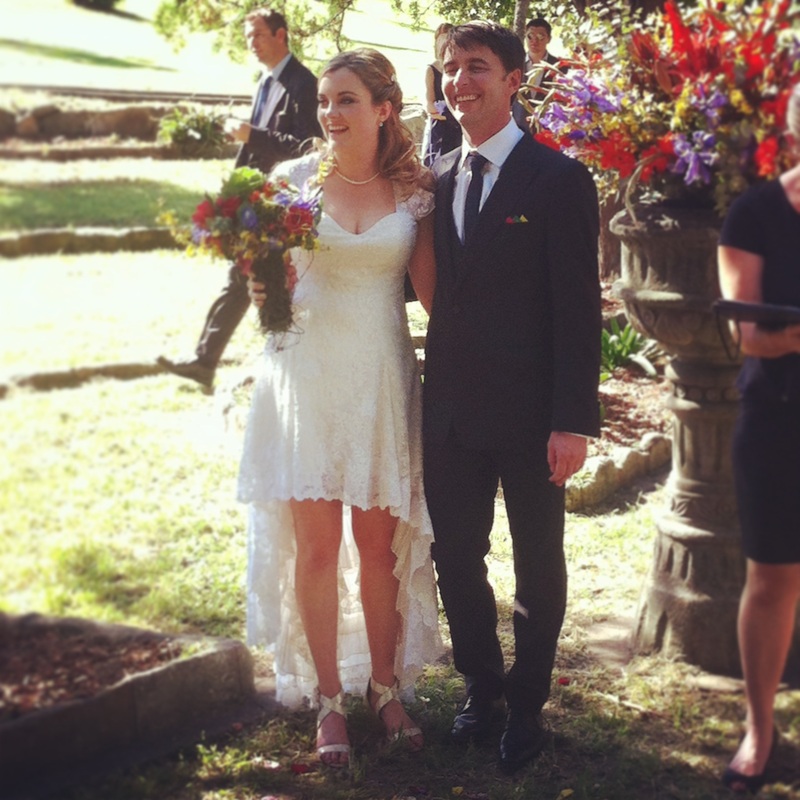
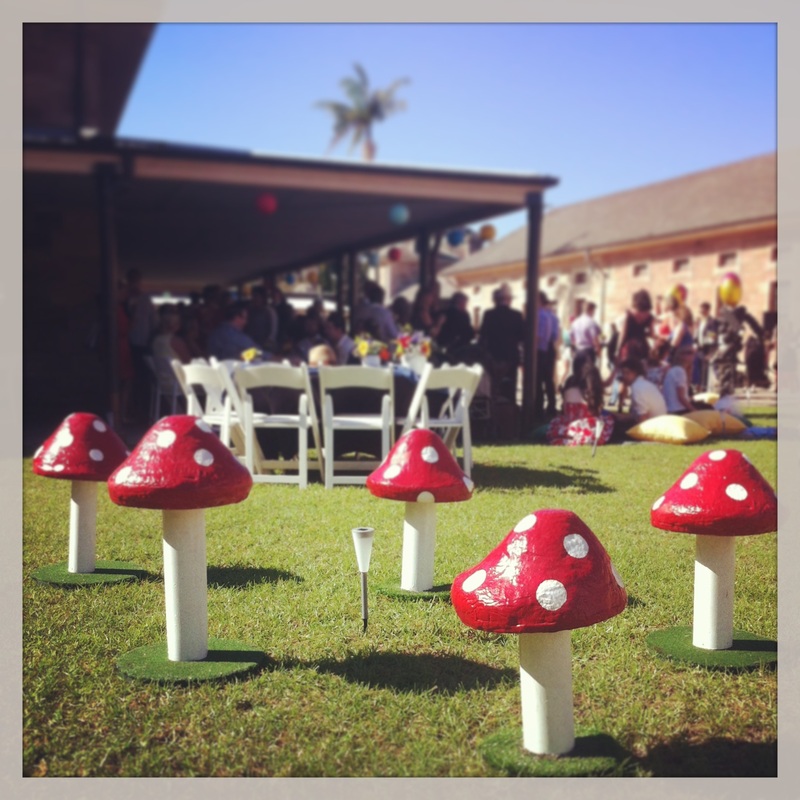
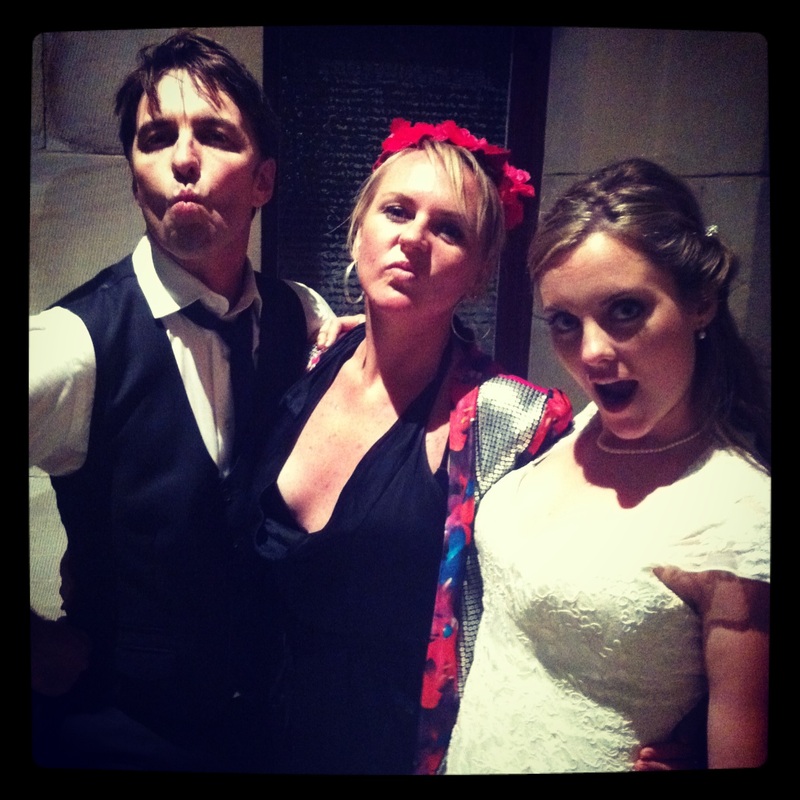
It's very simple and I found the process to be quite therapeutic (apart from the occasional hot glue burn. Because hot glue is involved, this garment is more of a costume rather than a wash-n-wear item. If you would like to make this washable then hand-stitch the pom-poms on and shimmy down the street knowing that it's ok to sweat this garment up as you can hand-wash it when you get home! Enjoy wearing your rainbows! If you have some Revamped Rainbow creations of your own please feel free to post them on the Revamped Fashion Facebook Page. The Revamped community love to be inspired by your sharing! 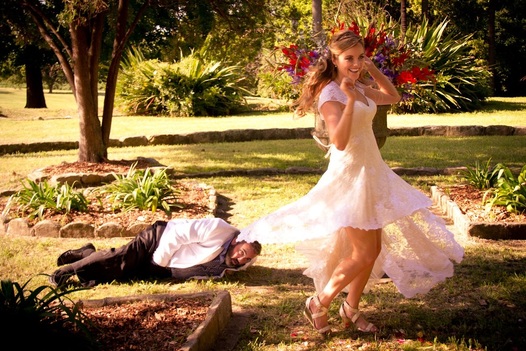 This picture sums up the ceremony perfectly! A whimsical wedding where two comedians unite! (The guy on the ground is a groomsman and I think he's trying to look up Laura's dress.... Thank you for the great picture Sexton Blake. On Saturday, March 9th, I had the absolute pleasure of attending the wedding of my good friends Laura and Bryan. This wedding was extra special for me as the bride's dress was my very first Revamped Bridal gown! This dress took two bridal gowns, over sixty cut pattern pieces, and eighty-one hours of sewing (over fifty of those were sewn by hand). Laura was referred to me after she posted on Facebook "I have my mum's wedding dress and my grandmother's wedding dress, and I need someone to make my wedding dress from them. Anyone know someone who can do that?" Sounds like a match made in heaven to me! 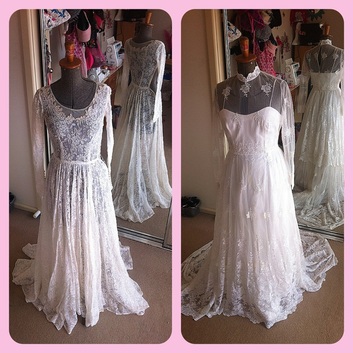 1950's on the left, 1980's on the right. Laura's grandmother had kept her beautiful, hand-made gown in perfect condition since the 1950's. The flat lace design was divine and the dress had beautiful frilly petticoats and a night slip to go with it. Laura's mother's dress was a classic gown from the 1980's. It had a beautiful long train with detailed lace designs and scolloped edges. I knew this dress (and it's beautiful edging) would be ideal to create the train. There were lots of flowers on the bottom with beautiful vines that crept up.  This shot shows the blending of the laces. The brief for the dress was: - Drama - Comfort - Danceability - Whimsical Laura had been collecting inspiration pictures for a couple of months, so when it was time to sit down and design her dream dress we had a lot of fun! When designing Laura's dress I needed to take into account the materials I had to work with. I actually managed to create Laura's dress and under skirt using about 97% materials from her mother's and grandmother's dresses. The only new things I needed to purchase were the metal boning for the corset, some calico which I used inside the bodice, a ribbon I used as the band for the petticoat, sewing threads, and some hooks and eyes. Everything else was revamped! 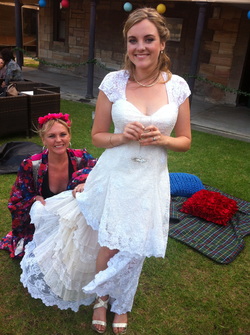 A great shot of the petticoat. The many hours of hand sewing were spent on combining the two laces. Laura's grandmother's dress was ivory and Laura's mother's dress was white, so it was important to seamlessly combine the two. I spent many hours, carefully trimming around the flowers and vines of the white dress and hand stitching them, flat onto the ivory lace. I'm so pleased I took the time to do this because, as you can see in many of the pictures, the white flowers seem to pop-out (in an iridescent way) in certain light. The final touch of the dress was the petticoat. I created the can-can style skirt with the frill on the inside. The frills added the drama Laura was looking for, in a non-bulky way. The petticoat is a great piece on it's own and it was created from the beautiful frills and lace I found on the undergarments from Laura's grandmother's dress. 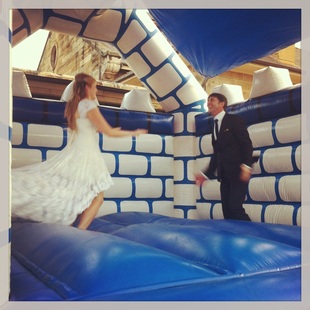 The 'Bridal Jump'! Laura and Bryan had such a wonderful day and I'm so happy for them! It was wonderful to see Laura looking so comfortable and carefree all day! The dress came up a treat in the 'Bridal Jump' (yes they had a jumping castle at their reception)! No restrictions at all. Congratulations Laura and Bryan and thank you so very much for this amazing opportunity! If you would like to have a Revamped Couture Creation for your special day (or if you know someone else who would like one), please don't hesitate to contact me and we can start planning. Bridal, formal, cocktail or other special occasions. I would love to create a special piece just for you! Now here are some more pictures from that special day. Enjoy!
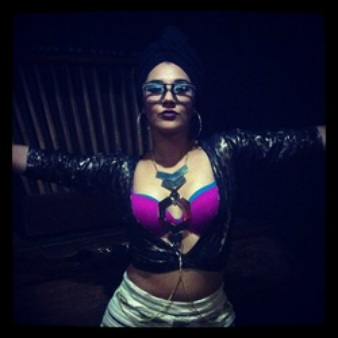 I was shopping with my good friend ALPHAMAMA on Saturday, in preparation for her gig. It had been a while since her last big show and we wanted to make an impact! I totally fell for these metallic, leopard print leggings. We bought the leopard print leggings, a skirt, I bought myself a pair of leggings, then ALPHAMAMA had this fantastic idea!
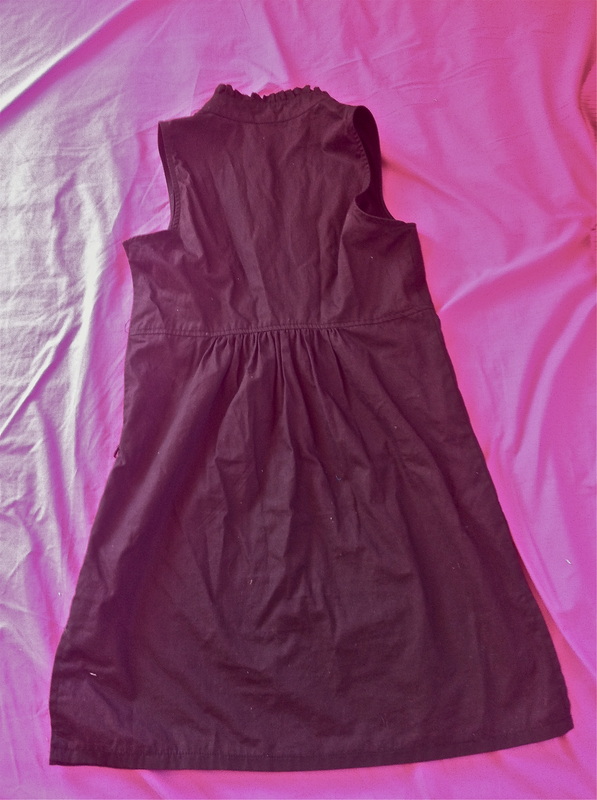
"I want to cut a hole in the crotch and wear the leggings as a top." What a fabulous idea! As you can see from the above picture, it looks hot, Hot, HOT! To create this look I started out by cutting a neck hole in the crotch. Have a look at a t-shirt and you'll see that the neck hole is cut straighter in the back and have more of a scoop in the front. Use one of your t-shirts as a guide to measure how big to cut the hole. Once ALPHAMAMA tried the leggings (which are now a top) on, we decided how to customize. ALPHA wanted to show some more skin, so I cut the centre back crotch seam straight down the back, stopping at the elastic (waistband). Voila! That's it. So quick and simple and so effective! So many of the audience commented on how great ALPHAMAMA's performance was and also how great she looked! How else could you convert your leggings? Plenty of times I've converted stockings into shrugs, and cut up fishnets to wear as sleeves. Head on over to the Revamped Fashion Facebook page and share your ideas of ways to convert leggings. I love, Love, LOVE tails! The glitz. The glamor. The razzmatazz! A garment with tails makes me want to grab a top hat and tap dance. Whoo! 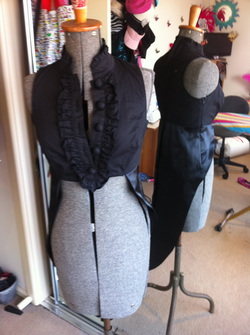 I was thrilled when I came across the challenge of transforming a pretty average looking top into a sexy new tails creation! The original top had a great collar and shoulder line, so I wanted to keep those things as a feature. The bottom half of the top just hung... So what I've done here is I've cropped off the front of the top (I finished the inside nicely with some bias tape), and then I've used the bottom of the bust lines as my guide for the line of the tails. I found a satin skirt to cut up and use for the lower half of the garment, and the fabric which was formerly the bottom half of the top was used as lining.
Have a go and see what you come up with. It's possible to create 'tails' coats, vests and tops out of long jackets, suit jackets, dresses and probably more! As always, feel free to share your creations and post them on our Facebook page: http://www.facebook.com/revampedfashion
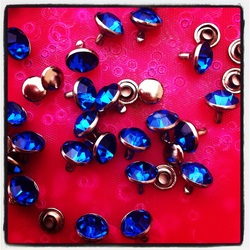 Do you have a plain blazer that you'd like to add some Zing! to? Today's Revamped D.I.Y will not only help you to create an original blazer which will stand out in the crowd, it will also (at least) triple the value of the blazer! Years ago I was browsing in my favorite Adidas Originals store when I spotted an AMAZING football jersey dress by Jeremy Scott. It was covered in jewels, all silver and blue and it was absolutely divine! I've kept that dress in my memory for years and finally, I found the inspiration to incorporate the blue and silver jewels into something I can wear every day!  The Adidas dress which inspired it all! One day I happened to come across a royal blue blazer. I loved the colour but the blazer was so plain! Then I realized... this was it. I could finally use that Jeremy Scott inspiration and create the blingin blazer of my dreams! What you will need: Blazer or Jacket Gem Rivets Rivet hammering tool (ask for this when you purchase the rivets) Hammer Chopping board Hole punch or scissors 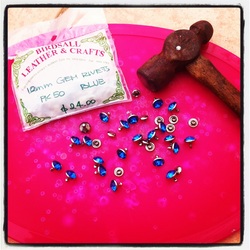 Some of the equipment you will need. The plain blazer was only $50 from Cotton On. A bit of a bargain for a blazer which was a very good fit. I then headed to Birdsall Leather in Botany (they also have a great online store. Check out the link) and bought a couple of packs of rivets and the little rivet punching tool required. I had to be careful when punching the holes in the collar of the blazer because it's a slightly stretchy material. I used a fine hole punching tool. If you don't have one of those you can gently use the end of your snips or scissors to poke a hole for the rivet to poke through. *Keep the holes small because if the holes stretch the rivets will fall out and you'll just have a holey collar on your blazer. Eek! Once I punched the holes, I poked the stem of the gem rivet (they call this the male part) through the hole, then, on the back side of the collar, I placed the back of the rivet (the female part) over the stem until I could hear a little 'click'. Next, I placed a soft piece of denim (or leather) onto the chopping board to protect the gem from getting scratched or damaged when I hammered the back on. 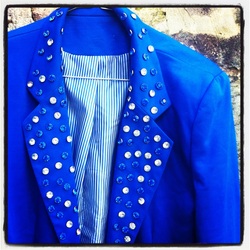 I faced the gem down onto the denim, and cupped the back of the rivet with the hammering tool. I gave the tool two hard bangs with the hammer and checked that the rivet was in place.
I like to place my rivets in randomly. You might like to create a pattern. I'd love to see your creations! What other things could you decorate with rivets or studs? Please post some pictures of your Revamped D.I.Y projects on our facebook page http://www.facebook.com/revampedfashion You can also follow us on Instagram @ revampedfashionlovesu |
AuthorI am a freelance designer and stylist who creates avant-garde fashion and costume. I specialize in custom making costumes for musicians, physical theatre, and dance companies. I love what I do and I love to share my passion and teach others :D Archives
April 2017
Categories
All
|


 RSS Feed
